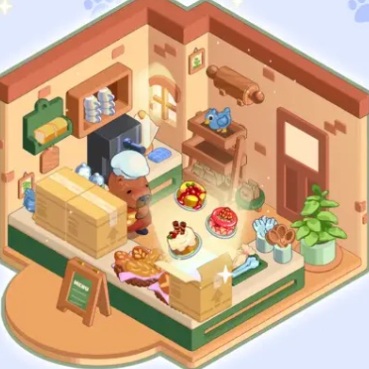
Dreamy Room第120关游戏攻略
Dreamy Room游戏第120关完整攻略指南
Dreamy Room Level 120 Armory Walkthrough & Guide
Welcome to the bustling forge and armory of Dreamy Room Level 120! This guide will help you assemble a fully-stocked medieval armorer's shop, complete with display areas, a functioning item chute, and even an upper-level workshop. Follow these steps to correctly place each piece of equipment and decor. This level unfolds progressively, revealing new areas and items as you build, so careful sequencing is key.
Step 1: Initial Ground Floor Setup Dreamy Room Level 120
Begin by establishing the foundational elements of the armory on the main floor.
- Place Wall Decor & Initial Items: Start by positioning the mirror on the left brick wall. Then, place the blue gloves beside it. Add the green floor mat near the center.
- Introduce Right Wall Elements: A wooden crate will appear near the right wall; place it. Next, the first suit of armor arrives for the right wall – position it accordingly.
Step 2: Activating the Item Chute & Early Furnishings Dreamy Room Level 120
A unique interactive element comes into play early on.
- The Mysterious Opening: A dark, rectangular opening/chute will appear in the right wall. Small white spheres will start appearing; ensure they fall or are guided into this opening. The first successful one will earn you a star.
- Construct the Ramp: A wooden plank will become available. Position this plank to create a ramp leading from the floor up into the chute opening.
- Populate the Floor: As more spheres roll into the chute (earning stars), a knight figure will appear on the floor near the opening – place it. A treasure chest will also arrive; position it, typically to the left of the knight or central area.
Step 3: Expanding the Armory - Weapons, Banners, and Storage Dreamy Room Level 120
Continue to fill out the ground floor with essential armory stock and decor.
- Wall-Mounted Arsenal: Hang the pitchfork, battle axe, and decorative banners on the available wall spaces. Another suit of armor will appear for the left wall.
- Additional Crates & Furnishings: Place the various wooden crates that appear. Set up the small table with a lit candle and the initial small bookshelf or display stand.
- Storage and Utility: Position the wooden barrel and any smaller shelving units that appear on the lower right wall. Add assorted knives and other small weapons to walls or displays.
Step 4: Developing the Upper Right Shelving Area Dreamy Room Level 120
The right side of the armory will expand upwards, creating new display opportunities.
- Erect Upper Shelves: The right wall will extend, and shelving units will become available for this upper section. Place them.
- Stock the Upper Right: Arrange items like helmets, gauntlets, shields, and a small table laden with food onto these newly installed shelves.
Step 5: Introducing the Shopkeeper & Central Displays Dreamy Room Level 120
The armory's proprietor arrives, and the central area gets more detailed.
- Welcome the Armorer: An armored cat shopkeeper will appear behind a central counter area.
- Counter and Surroundings: Place potion bottles, scrolls, and a larger central counter/table if it appears.
- Decorative Touches: Mount the deer head trophy on the wall. Lay down any rugs that appear. Add potted plants for a touch of life. Hang any chains or hanging tools. More suits of armor will likely appear for floor display.
Step 6: Constructing and Furnishing the Left Balcony Dreamy Room Level 120
A new level opens up on the left side of the room, adding a workshop or private area.
- Build the Balcony Access: A wooden ladder will appear; lean it against the newly formed left-side balcony/upper floor.
- Furnish the Balcony: Place items on this balcony, such as a table with more food/drink, a larger bookshelf, more potted plants, and a hanging tapestry or banner. A window might also appear for this upper section.
Step 7: Final Armory Inspection & Completion Dreamy Room Level 120
With all items placed, give your armory a final once-over.
- Comprehensive Review: Check all areas – ground floor, right-side upper shelves, and left balcony – ensuring every item is in a logical and stable position.
- Interaction Check: Confirm the sphere-and-chute mechanism worked as intended and contributed to unlocking further items or stars.
- Aesthetic Cohesion: Ensure the armory looks well-organized, properly stocked, and ready for medieval adventurers. Once all items are correctly placed, the level will be complete.
Tips & Strategy
- Follow the Flow: Items often appear in a sequence that hints at their placement. Pay attention to where new items materialize.
- Interactive Elements First: Address mechanisms like the item chute early, as they can be prerequisites for other items.
- Large to Small: Generally, place larger structural items (shelves, counters, large armor stands) before smaller decorative or stock items.
- Character Cues: The appearance of the cat armorer signifies a major stage of completion for the central shop area.
- Rotate View (If Possible): Use any view rotation options to check placements from different angles, especially for wall-mounted items and items on shelves.
Key Challenges
- Managing the phased unlocking of different room sections (ground floor, upper right, left balcony).
- Ensuring the white spheres correctly enter the chute, which may require precise plank placement.
- Keeping track of the numerous small items (potions, scrolls, individual weapons) and finding appropriate spots for them.
- Distinguishing between similar items (e.g., different types of crates or armor pieces) if their placement is specific.
